Daily Vocab (dailyvocab.ca) is a learning tool for Latin and Greek words.
Daily Vocab's design is based on the learning technique of spaced repetition. Words are reviewed at increasingly longer intervals until they are permanently memorized. Spaced repetition improves long-term recall while minimizing the number of times each word needs to be reviewed.
You can use Daily Vocab as an independent language learner. You can also use it as an instructor or student in an academic course.
Daily Vocab was originally created at McMaster University in the Classics Department where it continues to be used every term by hundreds of students.
If you are an instructor who would like to use dailyvocab.ca for your class, please contact us at help@dailyvocab.ca.
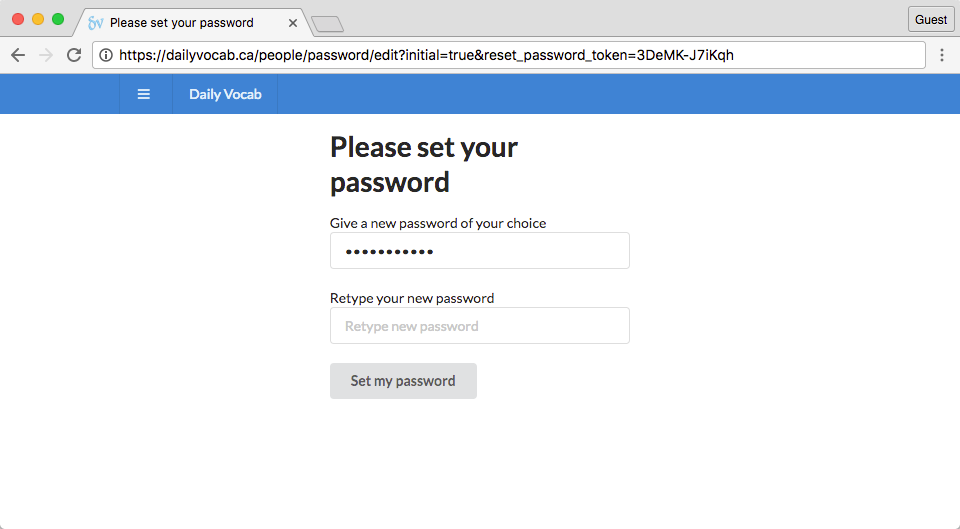
If you are a student and you do not already have an account, your instructor will initiate the process for you. You will then receive an email containing a link that will allow you to activate your account and set your password.
Choose a password that is easy to remember but hard for another person to guess. Once you have a password, you will be able to sign in to dailyvocab.ca using your email address as your username.
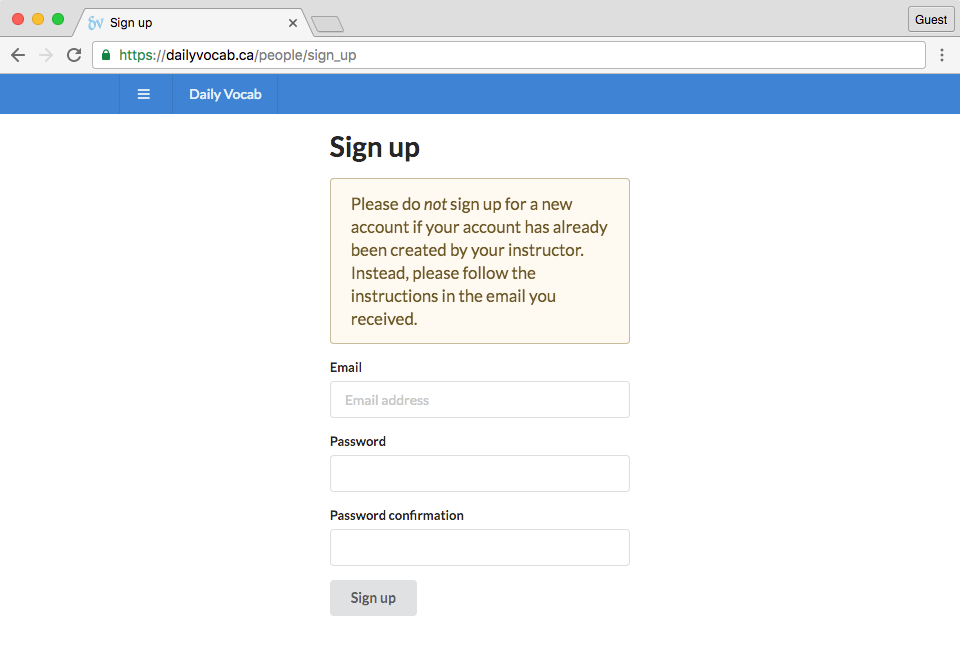
If you are using Daily Vocab as part of a course, your instructor will initiate the process. If you are using Daily Vocab independently or as an instructor, go to the sign up page. If you are an instructor, your privileges will need to be set up by an administrator. Contact us at help@dailyvocab.ca.
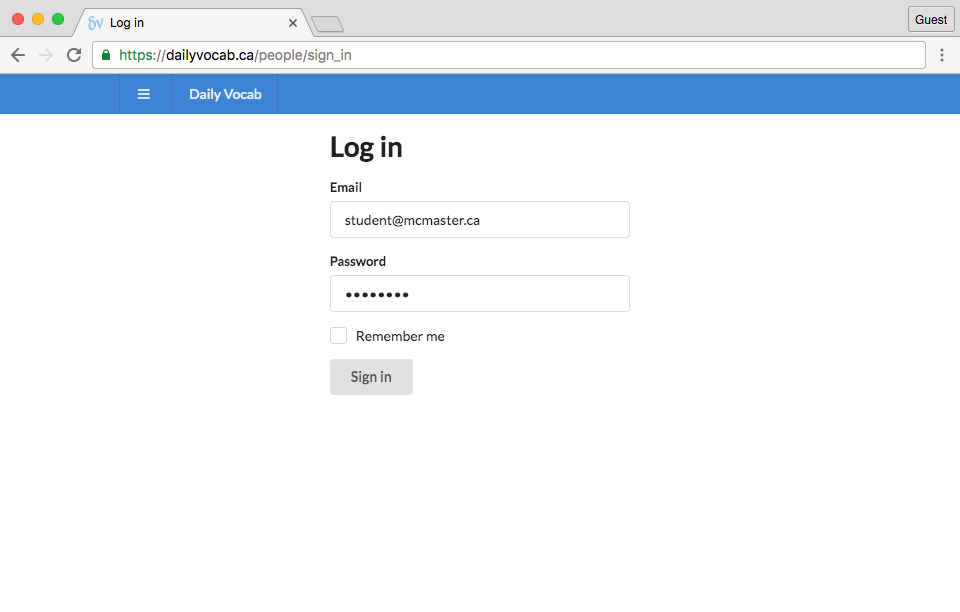
Go to the sign-in page. Enter your email address and your password and click on "Sign in."
Once you sign in, you will immediately go to a page with information about all your wordlists. If your instructor has not yet set up wordlists, this page will be empty.
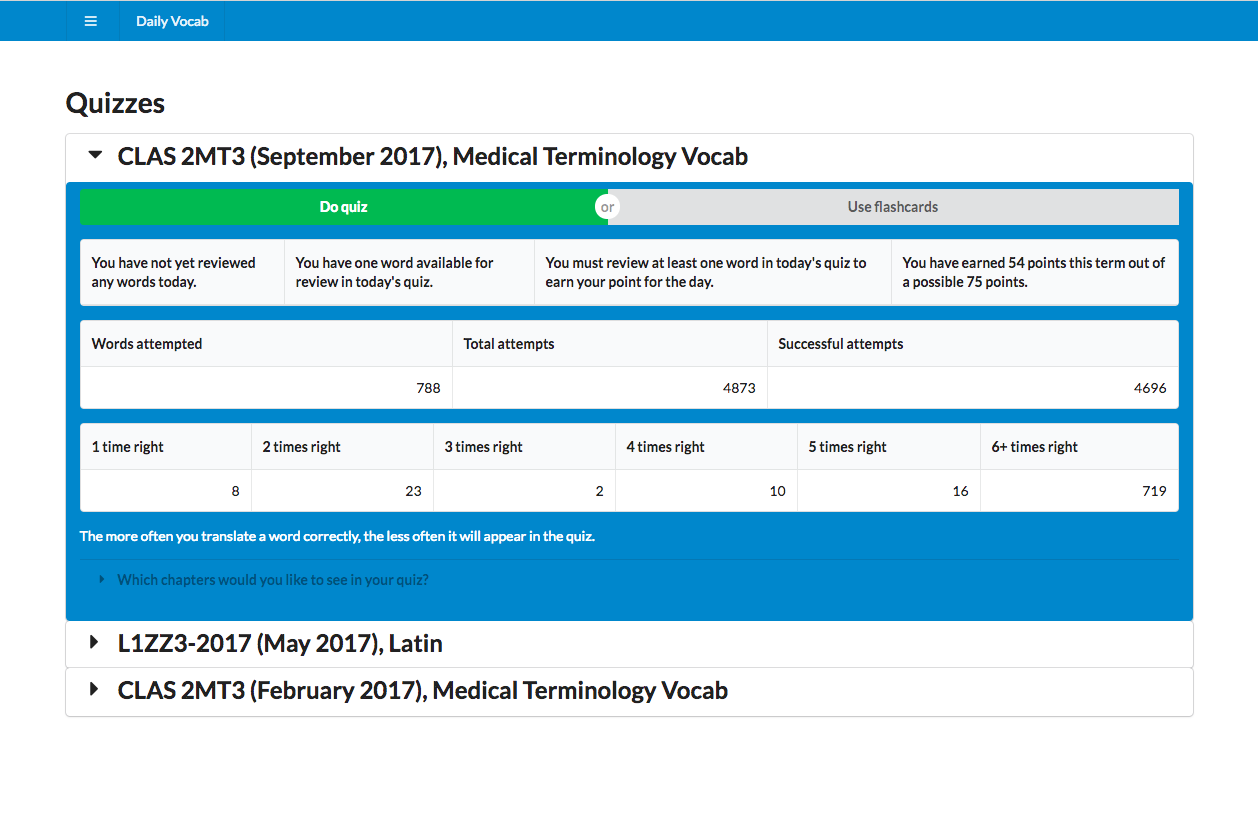
You will see information about each wordlist will appear in a boxes. These boxes can be hidden or revealed by clicking the black triangle in the top-left corner. At the top of this box, you will see the course code of the course that the wordlist is for (for example, LAT 1Z03) as well as the name of the word list.
You will see a big green button near the top of the box with the label, "Daily words." Click on this to start practicing.
Next to the "Daily words" button is another button with the label, "Extra practice (flashcards)." You can use the electronic flashcards at any time. You do not get points for reviewing the flashcards, but it can still be a helpful way to supplement your daily words.
Below these two buttons, there is a table with several fields:
Below this table is a second table with more statistics about your wordlist:
From your wordlists page, click on the big green button with the label, "Do wordlist."
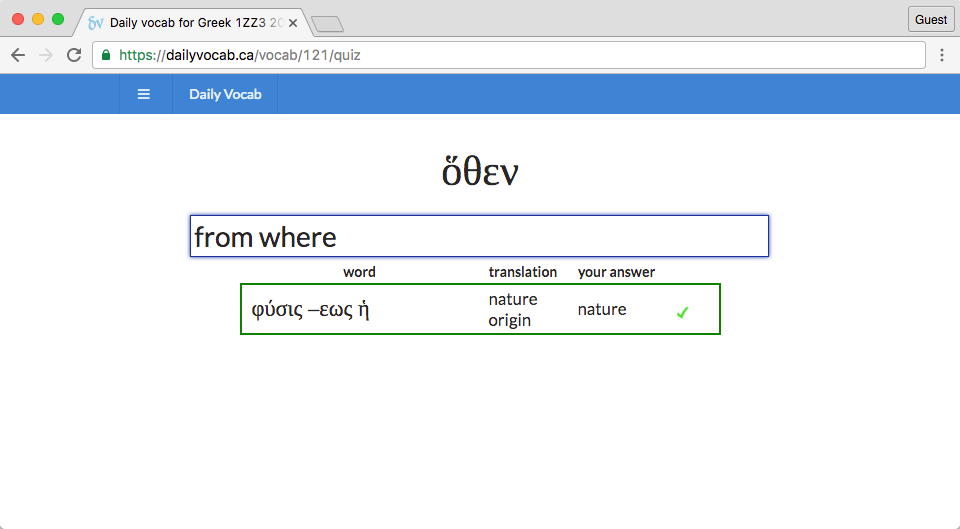
In large type in the middle of the page, you will see the word you are being asked to translate. Enter your translation into the box beneath the word, and press enter.
The page will show you right away whether you translated the word correctly. If the sound on your computer is not muted, you will hear a sound indicating whether the word was correct. An icon will appear briefly beside the translation input box as well, indicating whether you got the word right.
If the systems detects that your translation is almost correct (for example, if you've made a minor typo), it will not count the word as wrong, but instead give you another chance to translate the word correctly.
If you get a word wrong, it will appear again in the wordlist after you have reviewed the other available words.
When you get a word right, another word will appear for you to translate until you have reviewed all the available words.
As you review words, the last four attempts will appear in a table below the input box. That table will show a list of valid translations as well as your own translation. An icon will show you whether you translated the word correctly.
You can practice vocabulary on your phone or tablet by using the website or by buying the app. If you use the website, you will need a continuous connection to the internet. With the app, you are able to work offline.
A course instance is a particular course offered by a given instructor in a given term. One course can have many course instances taught by different instructors or at different times. The same course may be offered year after year. Each individual offering is separate course instance.
If you are teaching a course, you will need to create a new course instance for yourself. An administrator may already have done this for you. If the course you are teaching is new to the system, a new course will also need to be created.
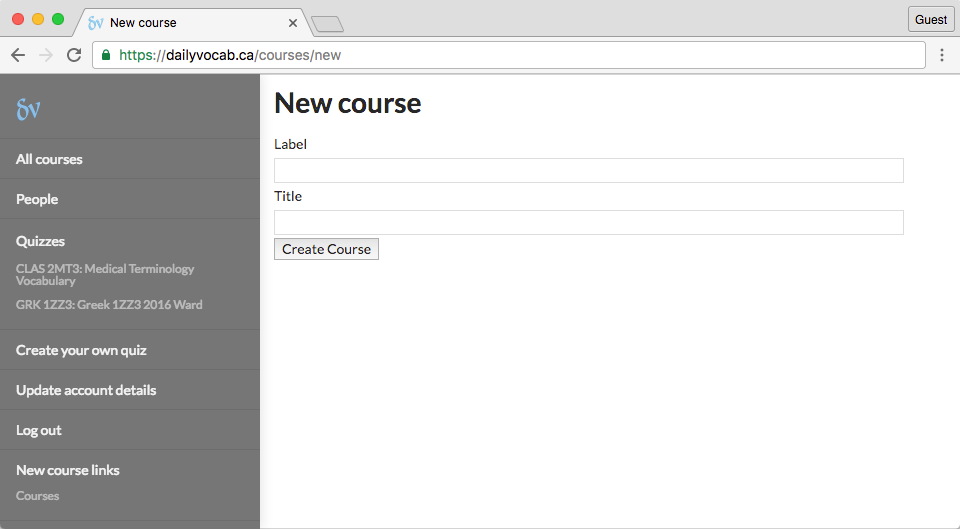
Click on the menu icon at the top of the page. A menu will appear on the left side of the page. Click on "All courses." If your course does not already appear in the first column of the course table, you can create a new course by clicking "New course" which you will find towards the bottom of the menu. After this, fill out the simple form, and click "Create Course."
The label of your course is the code for your course at it would appear in a course catalogue, for example, "LAT 1Z03." The title of your course is the full name of your course, for example, "Beginner's Latin 1." These fields can be modified later.
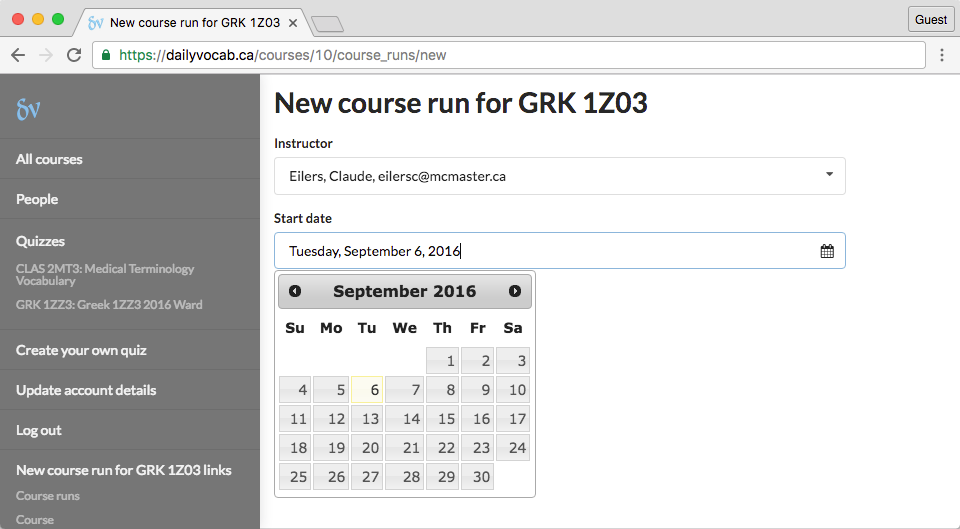
On the "All courses," find your course in the first column and check the third column to see if your course instance already exists. If not, click on "New course run" in the fifth column. Specify the start date This date should be the first day of the academic term. It is important for this date to be accurate. Click the button at the bottom of the form to create your new course instance.
Your course instance should now appear in the side menu under "Course I teach."
Click on your course instance in the side menu under "Course I teach." You will navigate to your course instance page from which you can administer and configure all aspects of your course instance.
This page shows you important information about your course instance with links to other pages with more detailed information. You will see the start date of your course as well as the number of enrolled students. The system automatically enrolls the instructor in course instance when the course instance is created. This allows the instructor to see and use the wordlists as their students do.
If you have teaching assistants, they will be listed as course admins. Teaching assistants can perform many of the tasks of administrating a course instance.
The course instance page lists the wordlists that you have added to your course instance as well as any wordlists created by your students.
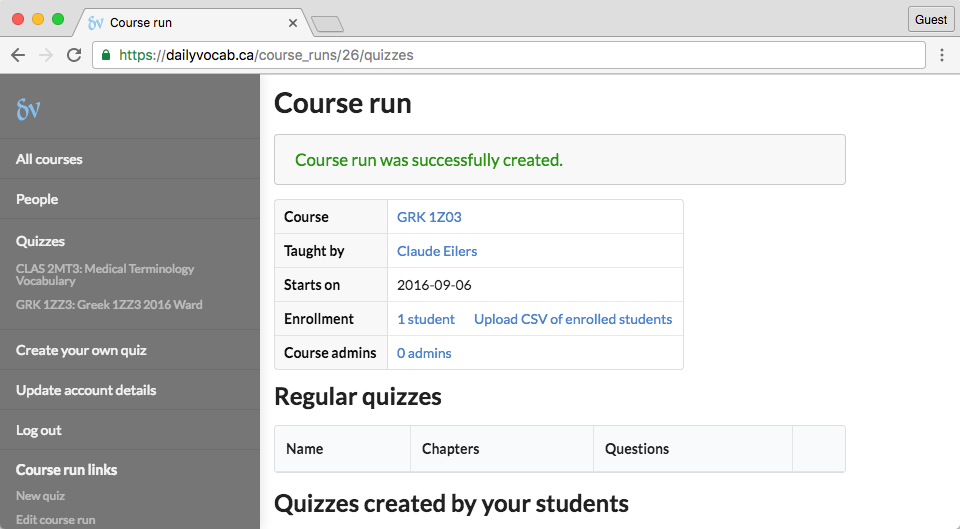
If you have TAs for your course, you can specify them as course admins. You can do this from your course instance page by clicking on "0 admins" and then clicking "New course admin" in the side menu. You should also enroll them in your course so that they too can see the wordlist just as your students do.
You will always have at least one person enrolled in your course instance--namely yourself. Being enrolled in your course allows you to try out the wordlist and see what your students see.
The normal way to enroll your students is by uploading a spreadsheet in Excel or CSV format. From your course instance page, click on "Upload list of students"
You will arrive at a page with instructions on how to prepare your enrollment list.
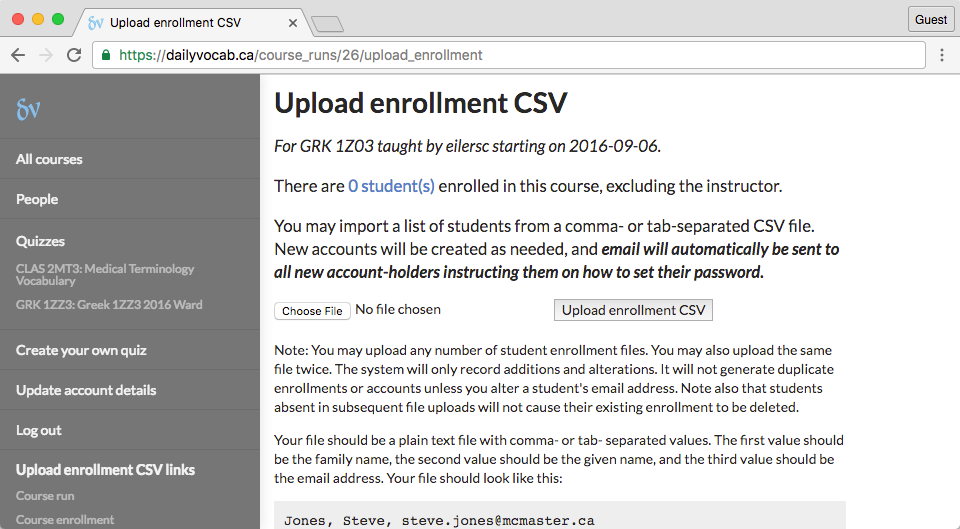
Once you have created the file, click on "Choose File", find the file on your computer, select it, press "OK" and then click, "Upload student list."
Your students will be uniquely identified by their email addresses. If they already have an account, they will now be able to use it to access your course wordlists. If they do not already have an account, one will be automatically created, and they will be sent an email with instructions on how to set their password and sign in.
They will have to set their password within a certain period of time (a few weeks). If they don't, you will need to send them a new email. You send the email by going to your course instance page and clicking on the link beside "Enrollment" which will have the count of your students (including yourself). For example, it might say, "20 students".
Once you've clicked on this, you will be linked to a page with a list of your students. From here, you can click on "Reset password". This will send a new email to your student to their email address on record. It is recommended that you use only institutional email addresses.
From your course enrollment page, you can also enroll students manually by clicking on "New enrollment" in the menu. Note that by using this method, you can only enroll students with existing accounts on dailyvocab.ca.
Students are invited to use the site on a regular basis to thoroughly learn the vocabulary for their course. Depending on how the instructor configures the word list, students are asked to sign in on 50 separate days during the term. The website gives students one point for every day when they correctly review the required number of words. The instructor can configure how many days a student must practice and how many words per day a student must successfully translate.
Daily Vocab uses spaced repetition. This means that the server keeps track of how many times in a row the student has correctly translated a word. The longer the streak, the larger the interval before that word appears again in the word list.
For example, if a student gets a word right once, they will normally see it again the next day. If they get a word right a second time, they will see it again after three days, and if they get it right again a third time, they will see it again after 7 days. If a student ever forgets a word and gets it wrong, they lose their streak for that word and start over at the first interval.
Spaced repetition allow students to focus their efforts on those words
The intervals are configurable by the instructor or wordlist owner. Though the default intervals work well, an instructor can shorten or lengthen intervals to suit their needs. For example, an instructor might want to shorten the intervals for the compressed summer term. Intervals can be specified in half-day increments.
There are three kinds of wordlists. First, there are course wordlists added by instructors for their students. Second, there are the student wordlists added by students, and associated with a course they are enrolled in. And third, there are personal wordlists that can be created, managed, and used independently of all courses.
You do not have to be enrolled in any course to create an account and use a personal wordlist. Personal wordlists are for independent study. Currently there is no cost to create an account and work with personal wordlists. We do however expect there soon be an app in the Apple App Store and in the Google Play Store for a small price.
Students wordlists are visible to instructors, and, with the permission of the author, the instructor may share the studend wordlist with the class.
In most cases an instructor will not want to create a wordlist from scratch, but to copy a wordlist from another course instance. There is an interface for doing this directly on your course instance page. You have two options for copying a word list: clone and migrate.
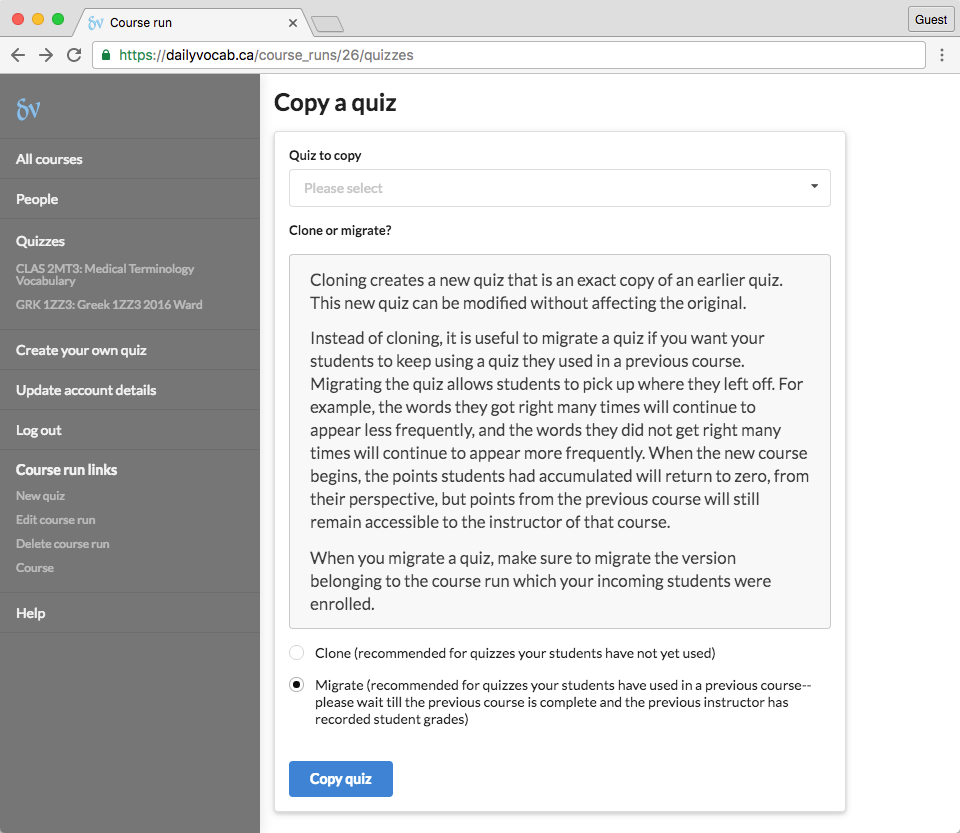
Cloning creates a new wordlist that is an exact copy of previously existing wordlist. This new wordlist can be used and modified without affecting the original.
Instead of cloning, it is often useful to migrate a wordlist. When migrating, the wordlist is not copied, but rather attached to your new course instance. Any changes you make to the content or configuration of the wordlist will be visible to the other course instances that use the wordlist.
Migrate allows students to use the same wordlist from term to term and to maintain some of their wordlist state. For example, with "migrate" the system will remember how many times in a row a student has correctly reviewed a given word.
We suggest that you use clone for the first course in a series, such as Latin 1Z03, but use migrate for subsequent courses, such as Latin 1ZZ3 where students are using the same textbook and are required to know the same vocabulary.
When you migrate a wordlist, be careful to select the version of the wordlist that belongs to the course instance in which your incoming students were last enrolled.
In all other cases, we suggest you use clone.
Alternatively, you can create a wordlist from scratch by clicking "New word list" in the menu from your course instance page. You will be presented with a form with the settings for your wordlist. Fill out this form and submit it to create an empty wordlist.
There are a number of ways to add questions to your wordlist. You can add questions one-by-one using the web interface provided. You can copy the word list from another wordlist, or you can upload a spreadsheet in CSV or Excel format.
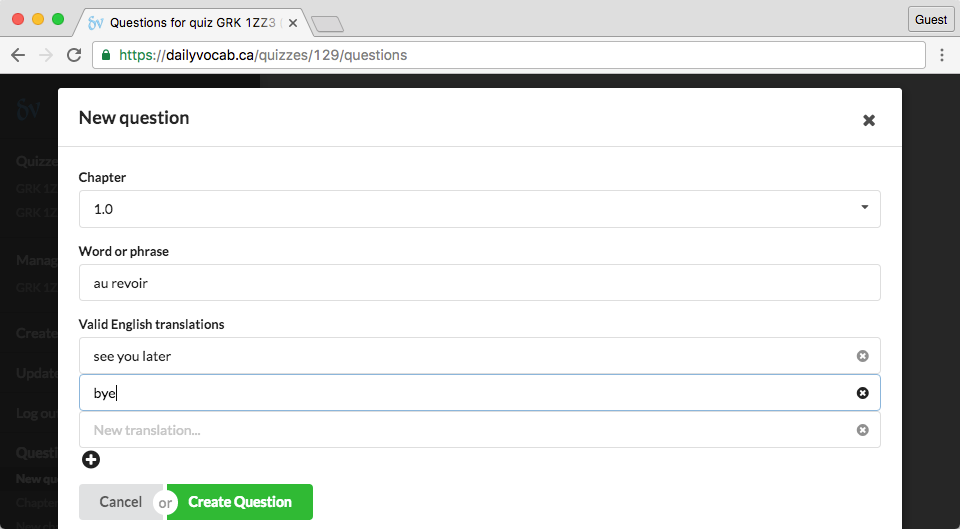
To add questions one-by-one, click on "0 questions" from your wordlist page and then click on "New word" in the menu. Fill out the form with a word or prompt and any number of valid translations or responses.
If you would like to remove a translation, click the "X" icon at the right end of the input box. If you would like to add a new translation, click on "+" icon near the bottom of the form. Once you have filled the form, click the "Create Question" button.
You can only create questions for existing units. A unit is a small subset of vocabulary in a wordlist. You can think of it as like a chapter in a book. Every wordlist is created with an empty first unit. You may add units by clicking on "Units" in the menu and then "New units." Fill out the form. Once you have added a units, you can add questions to them.
Continue in this way until you have created all your units and questions.
One way to add questions to your wordlist is to copy a world list from another wordlist that is already in the system.
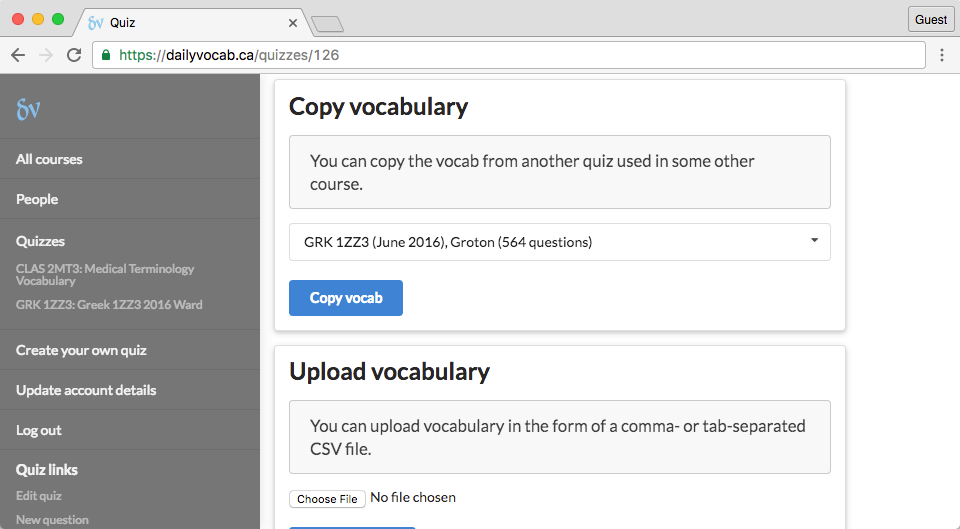
From your "Manage wordlist" page, find the box entitled "Copy vocabulary" and choose the wordlist whose units and questions you would like to copy into your own wordlist. Then click "Copy vocab." It may take a few minutes to finishing copying the wordlist.
To add questions to your wordlist, you can upload a spreadsheet. We currently accept CSV files, Excel files, and Open Office files.
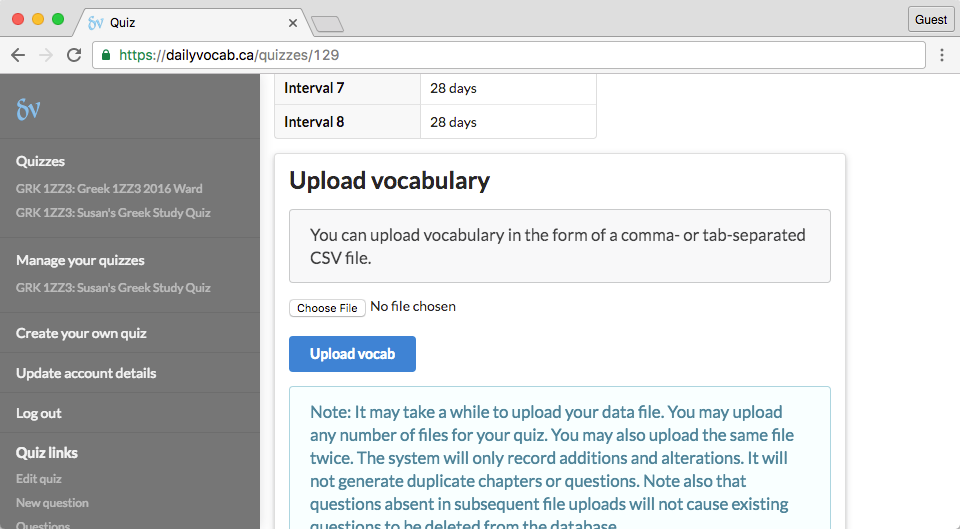
Find "Upload vocabulary" on your wordlist page, and click "Choose File." Select your file and then click "Upload vocab." It may take a few minutes to upload your vocabulary.
The format of your spreadsheet should be like this: the first column should have the unit number. The first row of each unit can specify the unit name in the second column. For the other rows, the second column should have a word or phrase you wish students to translate (the prompt), and the third and subsequent rows should have valid translations.
If you are preparing your wordlist in CSV format, it should look something like this:
1,"Introduction to Greek Verbs"
1,"αἴρω","I raise","I take up"
1,"ἀρῶ","I will raise","I will take up"
You can upload more than one spreadsheet for the same wordlist. Questions and units will be merged intelligently into your wordlist, removing duplicates.
Regular wordlists are visible by default to your students. Wordlists created by your students are visible when you choose share them--see How do I share a wordlist created by one of my students?
Though the wordlist is visible, units and their questions by default are hidden from your students until you release them. This allows you to release units as you cover them in class.
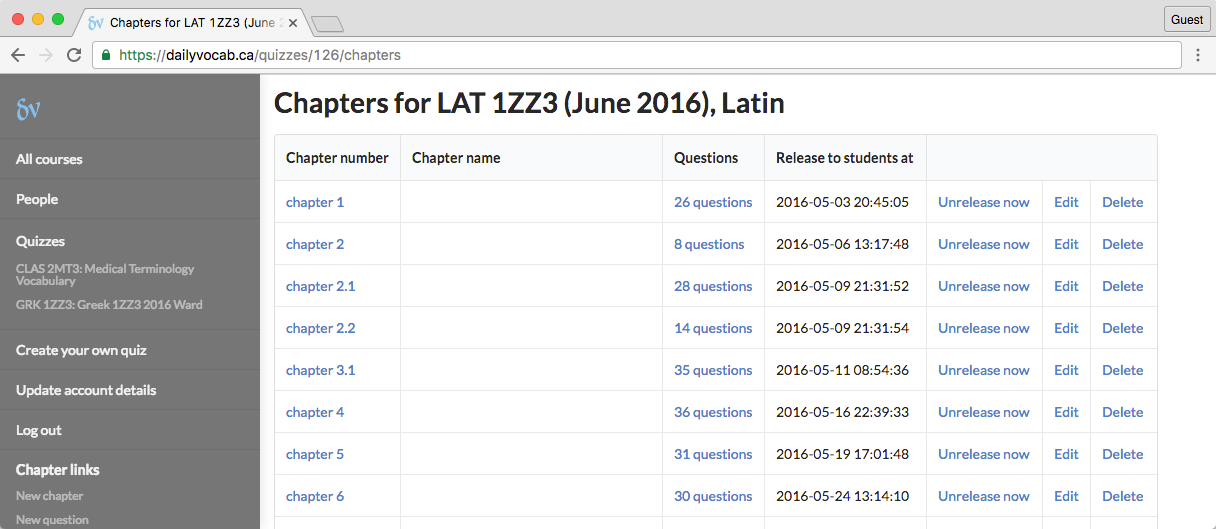
To release a unit, go to your wordlist page, and click on the number of units, e.g. "Units: 40 units." You will then see a list of all the units in the wordlist. On every row there is a link with the text "Release now" or "Unrelease now." Releasing a unit means making the vocabulary in that unit available to your students. To release a unit, click on "Release now." If for any reason you wish to hide the questions in a unit, click on, "Unrelease now."
If a student creates their own wordlist, no other students will be able to see it. However, instructors are able to see the wordlist and manage it and may choose to share it with other students. Students are encouraged to use the "Create your own wordlist" functionality to create wordlists for other courses, including courses in other departments.
To share a wordlist created by one of your students, navigate to your course run page by clicking on its link under "Courses I teach" in the menu. The table under "Wordlists created by your students" will have a full list of student-created wordlists for your course instance.
Click on the name of the wordlist you want to share. You will likely want to look at the words in the wordlist before you share it. You can do this by clicking on the number of questions. You will then see a page with all the words in the wordlist, along with their valid translations.
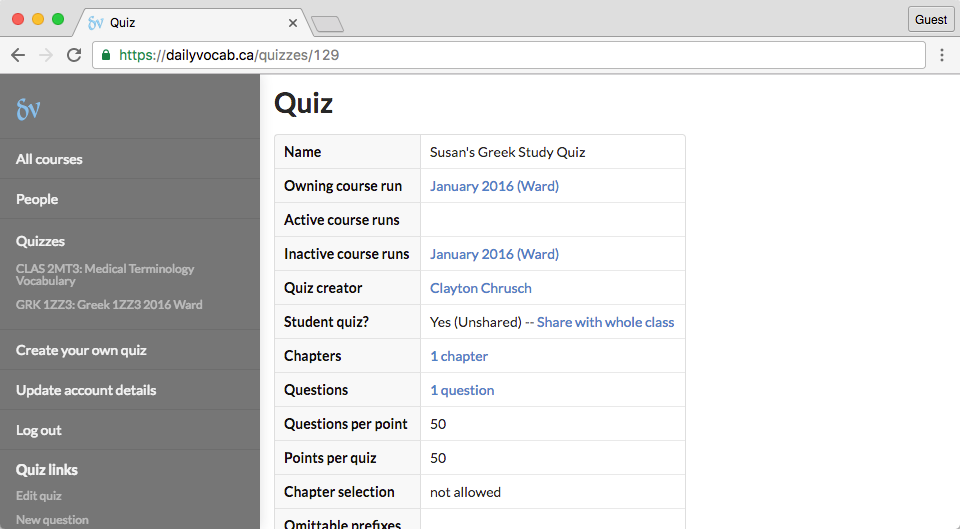
If you find the wordlist acceptable, go back to the "Manage wordlists" page. At the top of the page, you will find the wordlist information table. The first row will show the name of the wordlist. A few rows down you will find the label, "Student wordlist?" Next to this you will see, "Yes (Unshared) -- Share with the whole class." Click on "Share with the whole class." Now all students will be able to use the wordlist.
You can unshare the wordlist at any time. You can also modify the questions in the wordlist, add new questions, and manage it in all the same ways you can manage regular course wordlists.
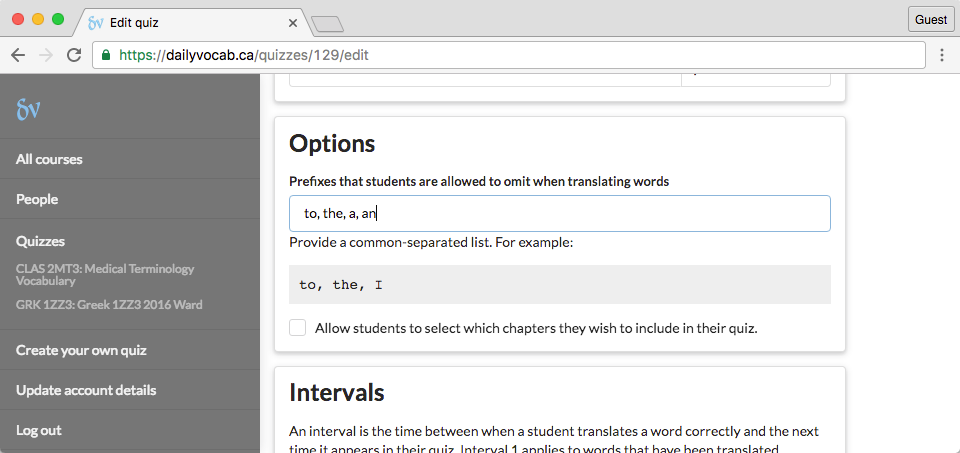
Omittable prefixes are small words such as, "to," "I," "the," "a," "an" which often appear at the beginning of valid translations. For example, in a French wordlist, you might include the verb "faire" for which you might specify "to make" or "to do" as valid translations. Sometimes students omit the "to" part of the answer. If the owner of the wordlist wants answers such as "do" and "make" to be counted as correct, they can add "to" to the list of omittable prefixes for that wordlist.
This practice is highly recommended as a way to make wordlists more flexible and less frustrating for learners. For authors of wordlists, doing this also gets rid of the need to specify multiple variants of the same translation. In this case, the author of the wordlist could specify only two valid translations, "to make" and "to do," but these translations would cover "make" and "do" as well.
You can specify omittable prefixes from your wordlist page by clicking on "Edit wordlist" in the left-hand side menu under "Wordlist links" and then updating the form.
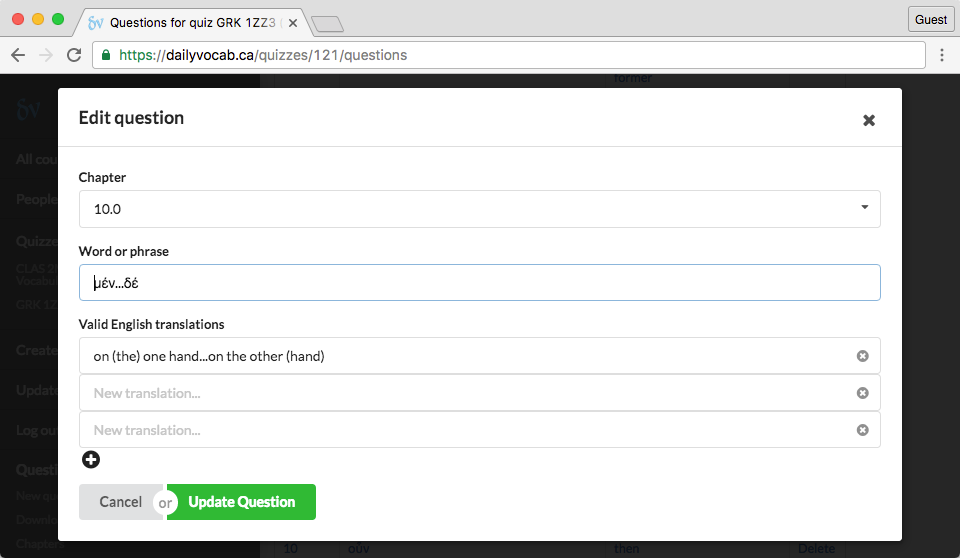
Another way for authors of wordlists to cover multiple possible valid translations without exhaustively listing them is by using parentheses to indicate optional parts of the translation.
For example, if your valid translation is "on the one hand...on the other hand," you may find slight variants acceptable and want to specify them in the word list. The recommended way to do this is to add parentheses around optional words, for example, "on (the) one hand...on the other (hand)".
Without parentheses, you would have to to list each possible variant separately. Parentheses also allow you to add extra information about word beyond the simple translation. For example, you specify a translation such as "yes (emphatic)". In this case, a student could type yes (emphatic) but they could also just type yes, and their answer would be counted as correct. In either case, the word list would respond by reminding the student of the extra nuance.
